DIY Magic Light Trick
/As promised, I am about to share one of the simplest and fun DIY projects with you all! I’ve been following Nesting with Grace for quite awhile now and have been a huge fan of her “magic light trick” but have yet to find a place in our house that I felt it would work. Until now!!!
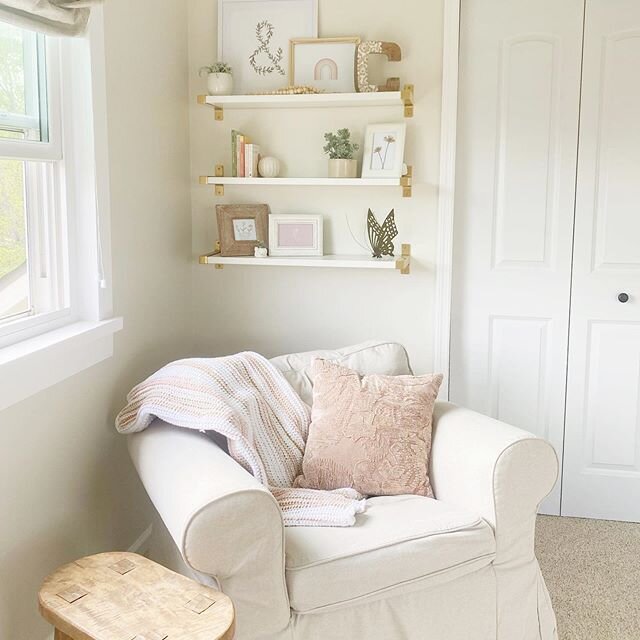
As most of you know we have been hard at work prepping our little girl’s nursery, when dreaming up this space I remembered this DIY tutorial I had stumbled upon almost a year ago! I knew we needed some sort of lighting in the nursery but I didn’t really want to have a lamp on her dresser/changing table. So… enter the magic light trick; which allows you to use remote control puck lights in sconces instead of having to hire an electrician to run power to them! Genius!
I went to work searching for sconces that would not only match her room and the style I am going for in there, but also something that wouldn’t break the bank. (Mama is always on the hunt for a good deal!) After looking at local hardware stores and online retailers, I ended up finding these (on Amazon of course) and instantly fell in love! They are the perfect neutral and even have a feminine vibe to them.

This project took less than an hour total and truly makes the room feel so much more cozy; which is always how I want our house to feel!
So, here’s what you’ll need:
Sconce(s)
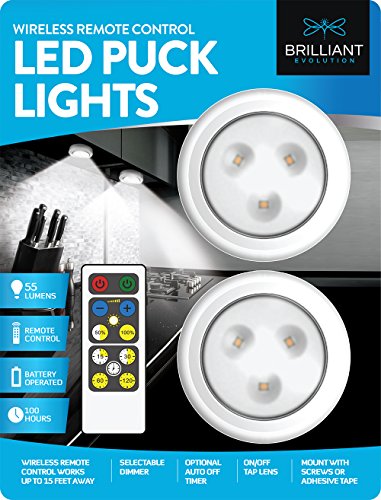
Remote control puck lights
Wire
Wire cutters
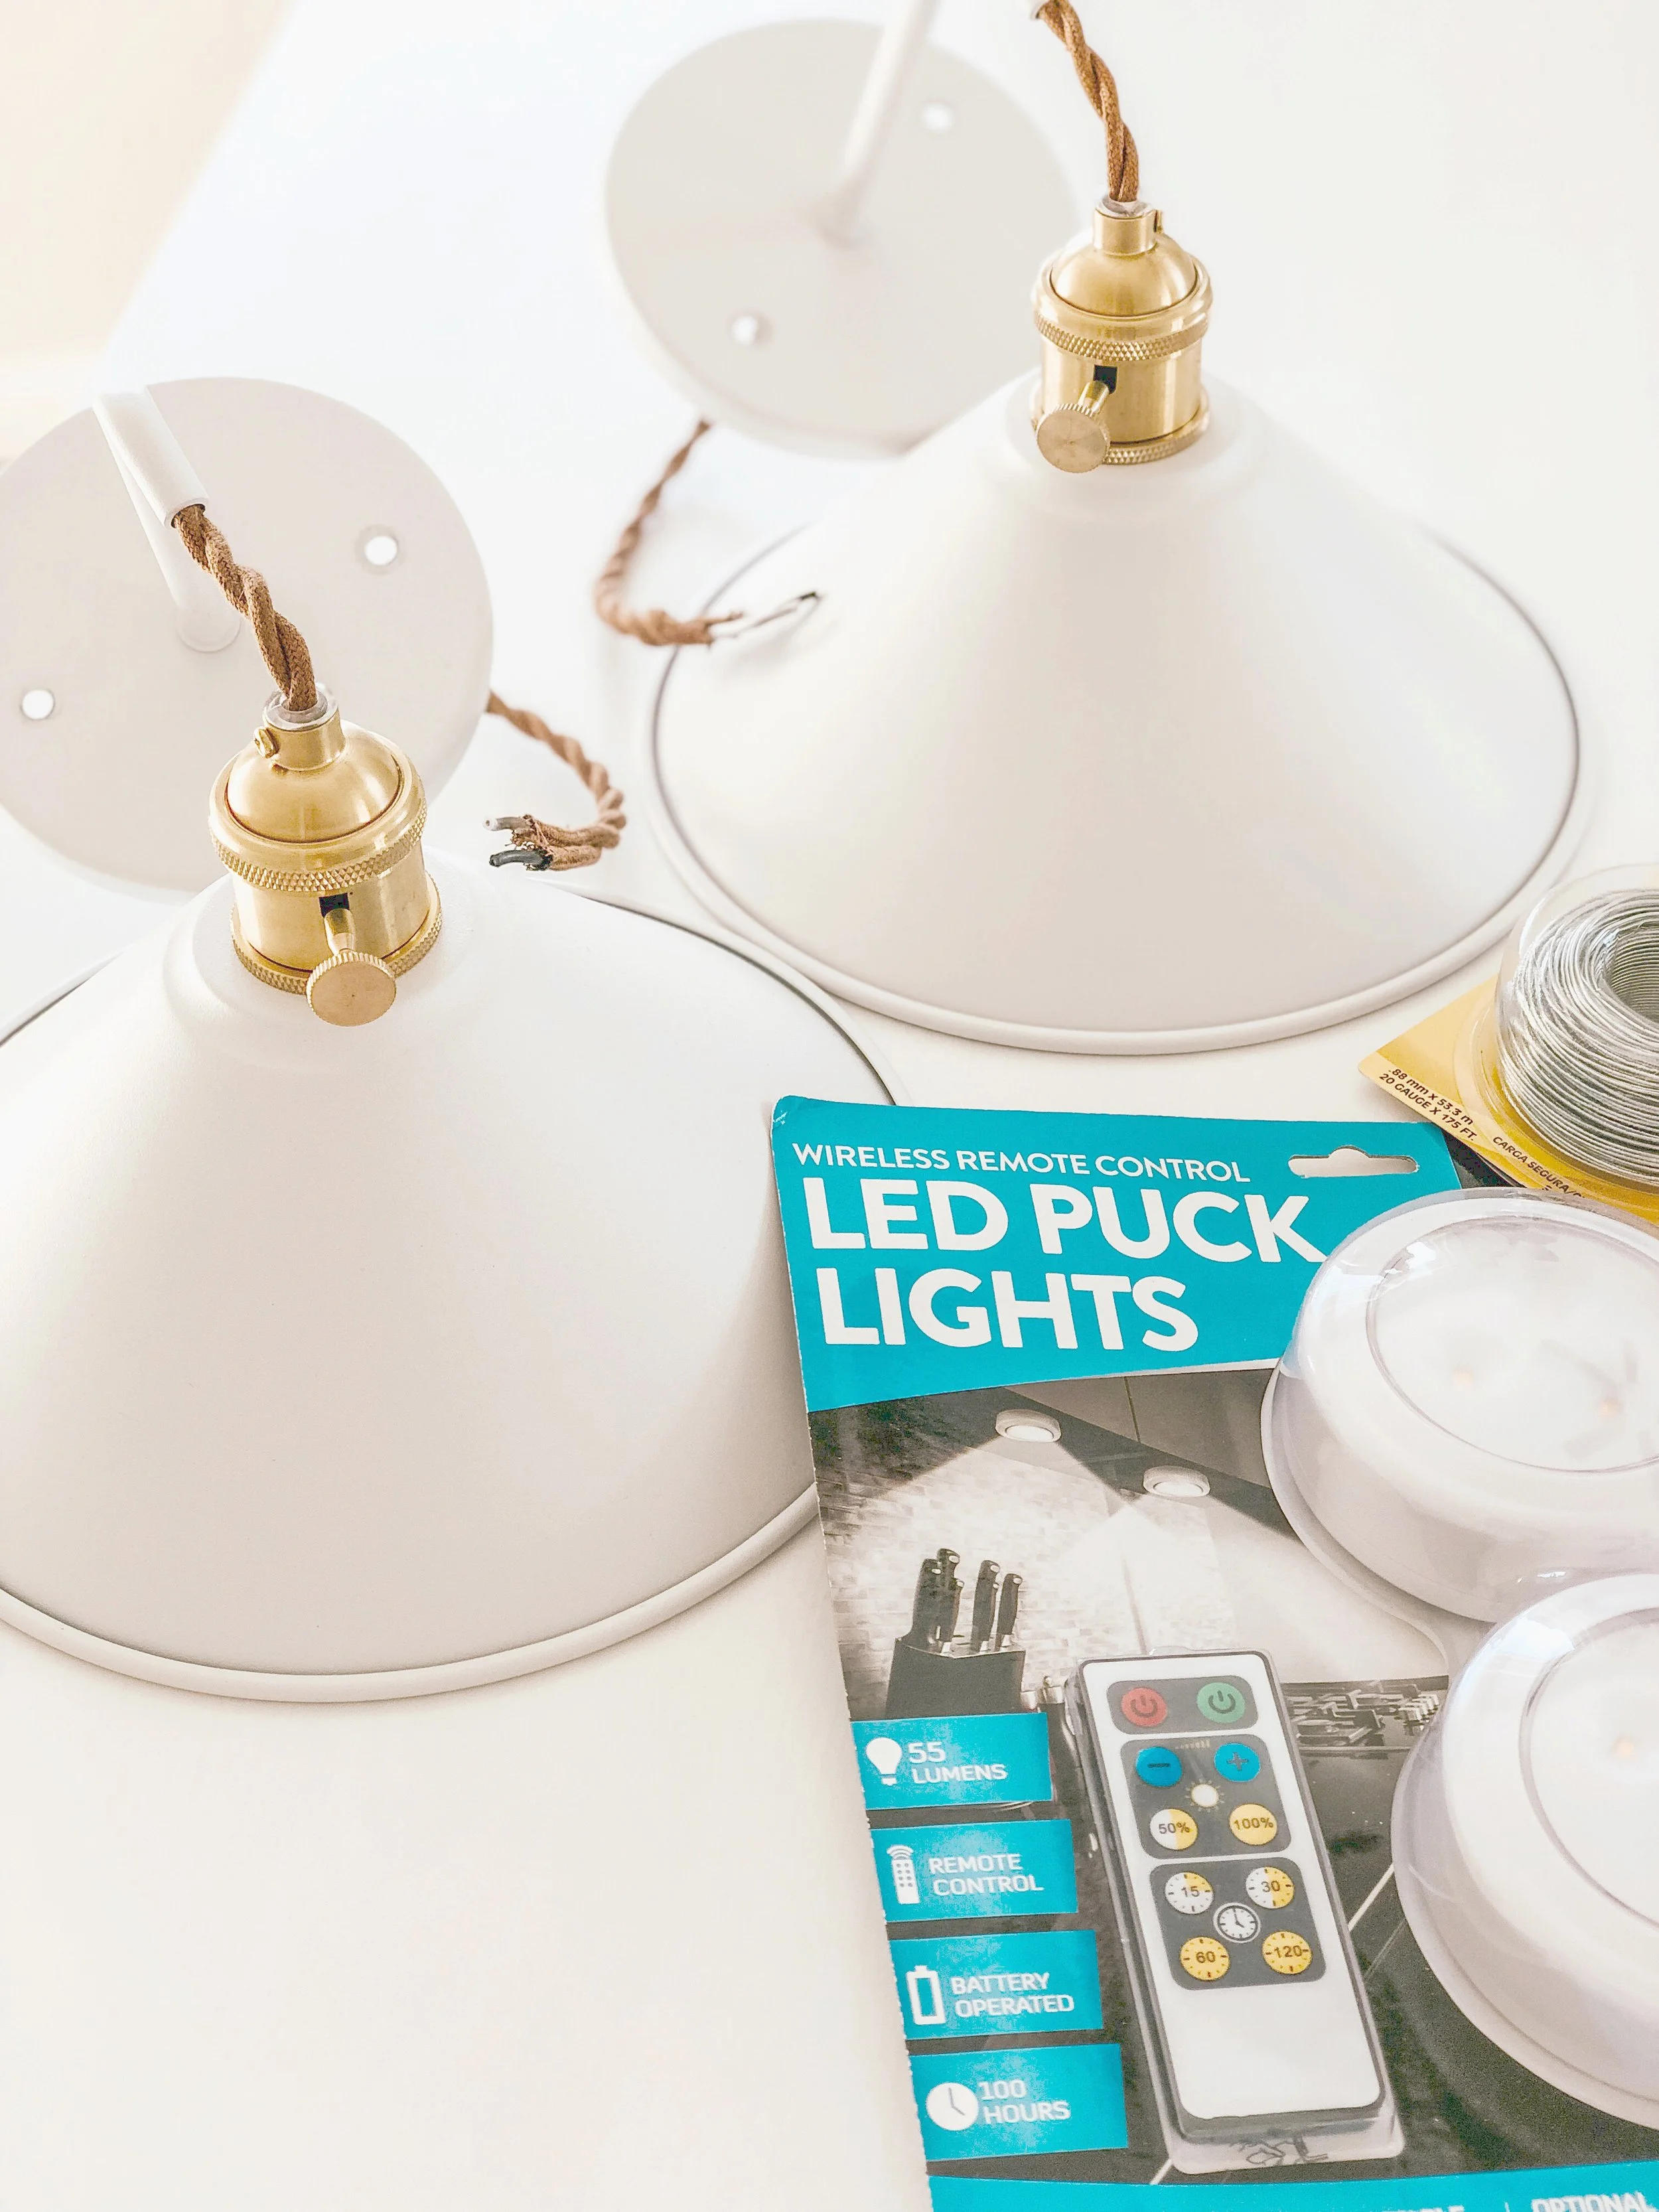
I ordered these battery operated puck lights from Amazon and actually already had the wire. I used 20 gauge jewelry making wire, but any wire would work! I knew I only needed 2 puck lights so went with this pack. (They do sell larger packs as well if you wanted to use them for under-cabinet lighting or something similar though)
Step 1- Cut and attach your wire/install batteries
Start by cutting a piece of wire longer than you think you’ll need, don’t worry we will cut the excess later. Then simply wrap the wire around the light socket a few times and twist the wire around itself to make it tight. Go ahead and open your puck lights and install the batteries; leaving the back of the puck light off for the next step.
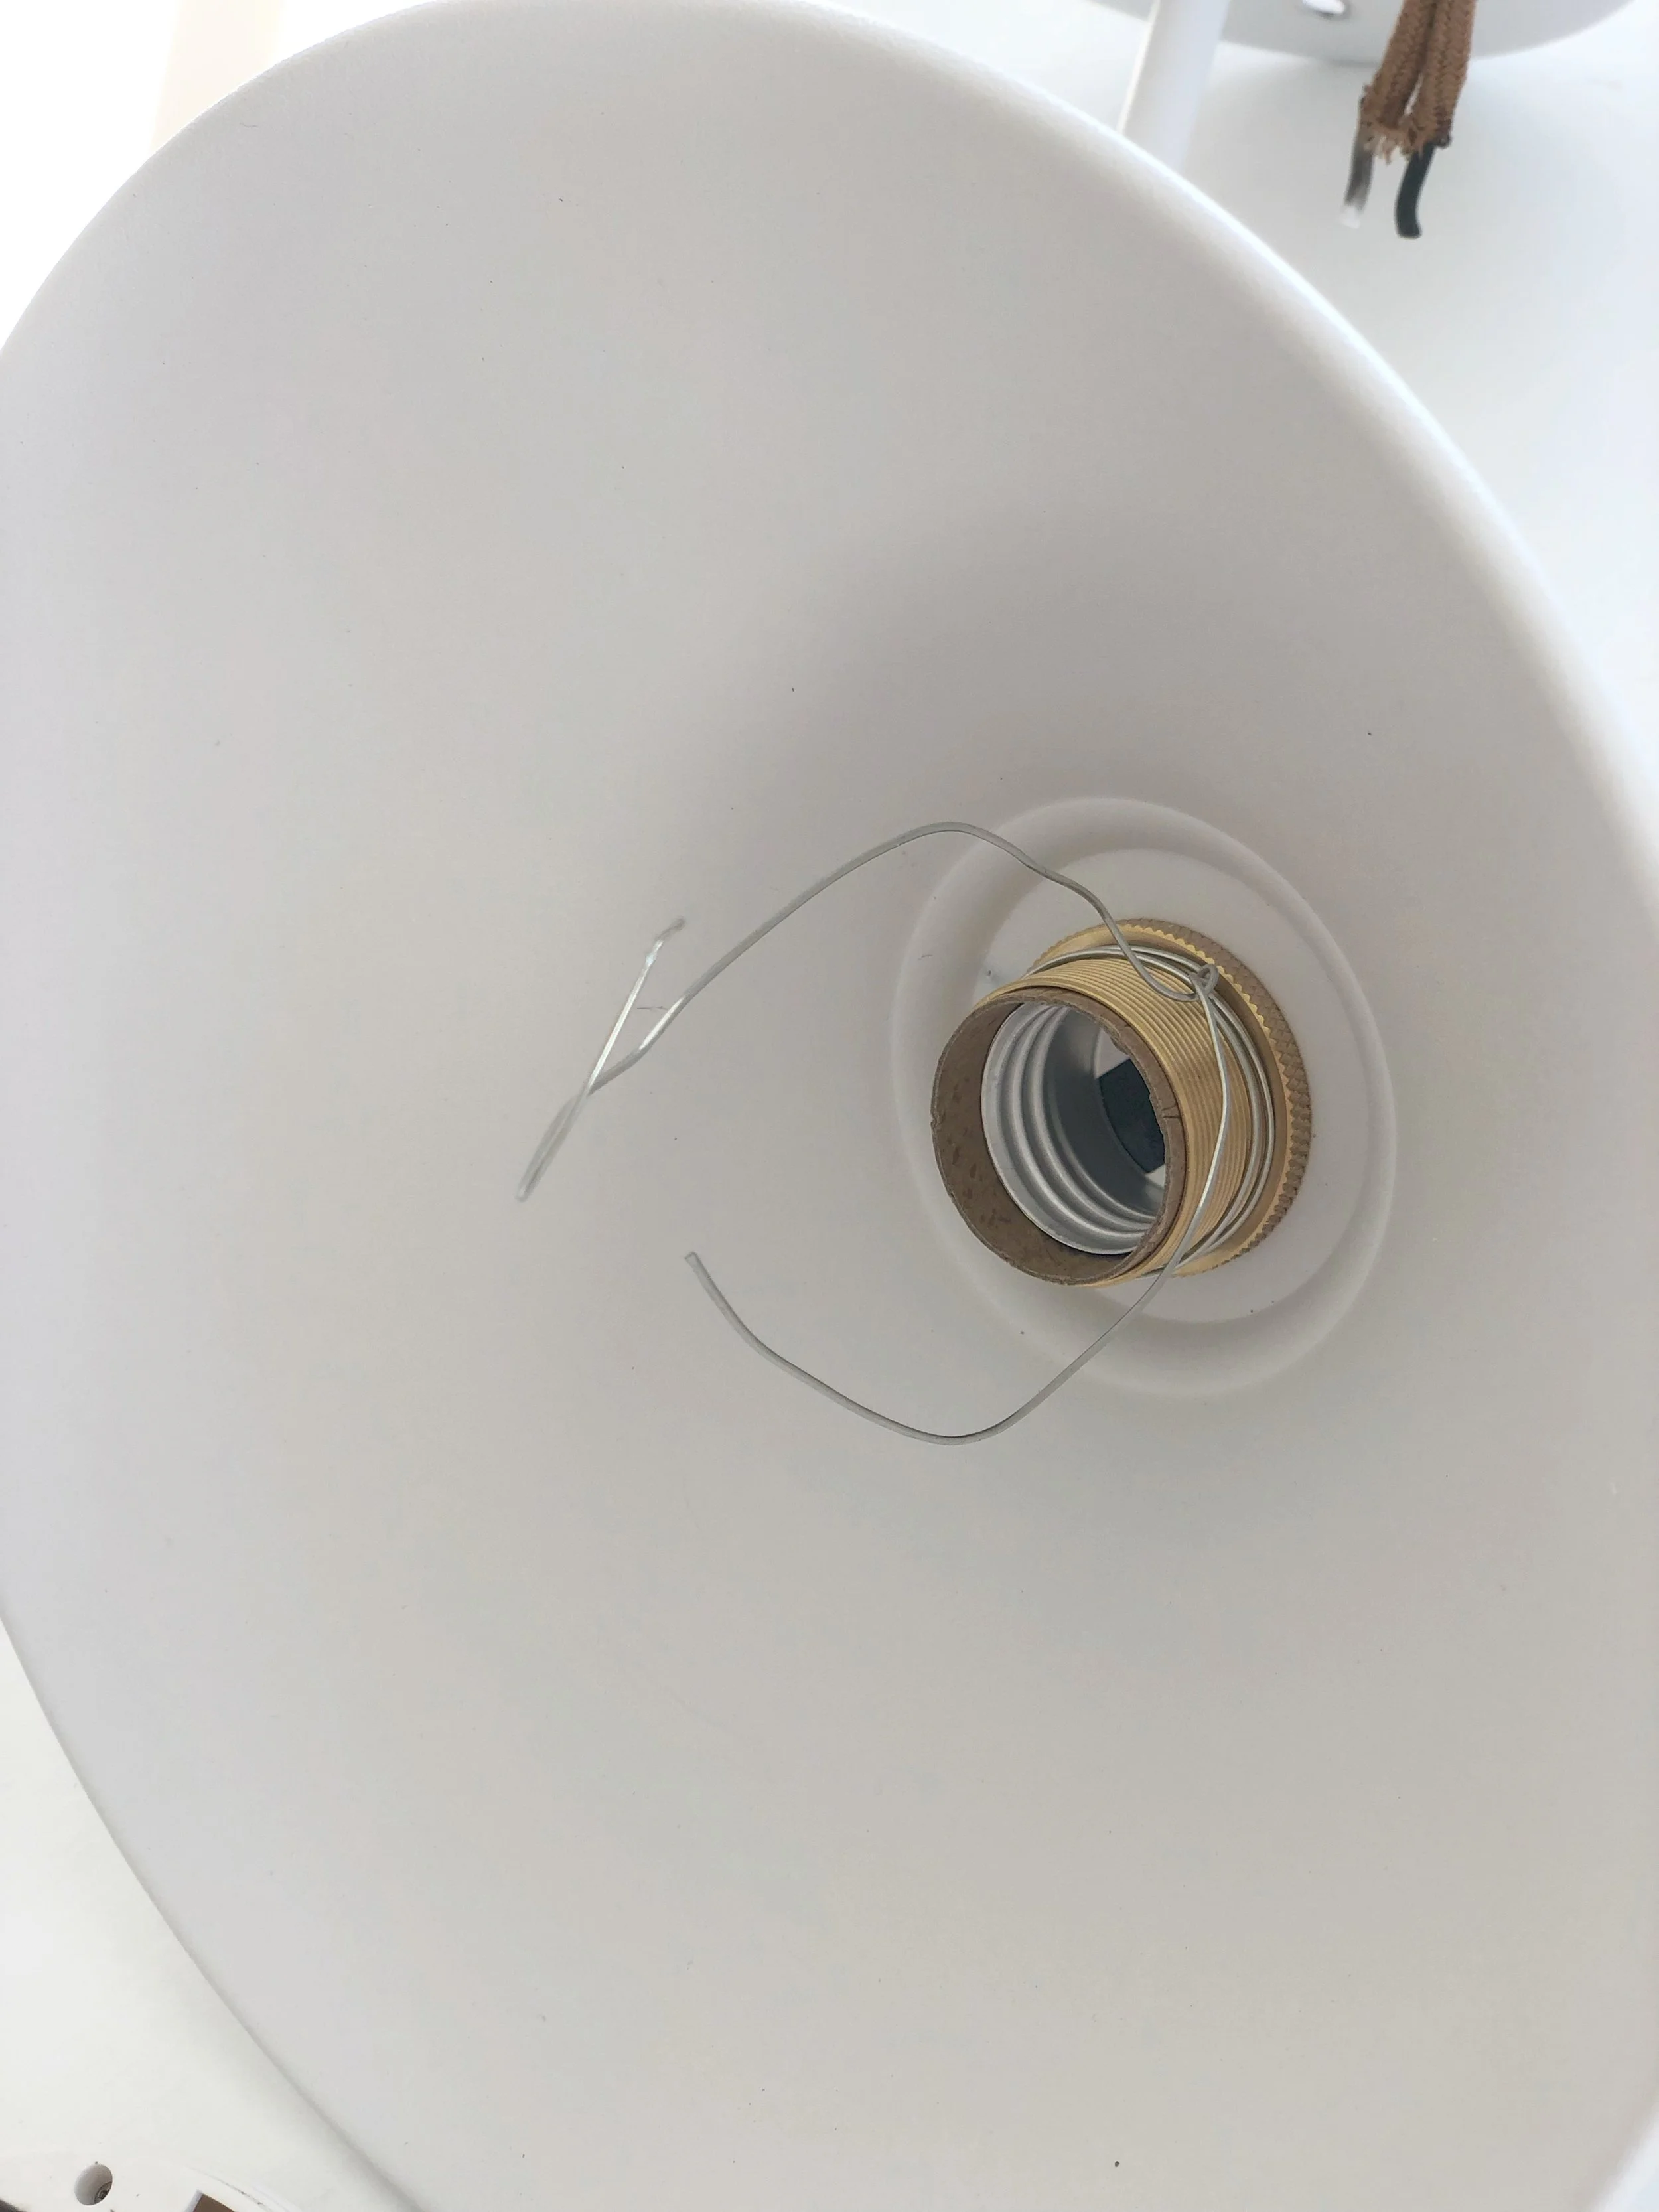
Step 2- Attach the puck light backing
Take the back part of the puck light and slip the wire ends through the 2 holes, then wrap them tight around one another. Be sure this is very secure as this is what will hold your puck light in your sconce. Then cut the excess wire leaving only a little extra that can easily be tucked in the puck light.

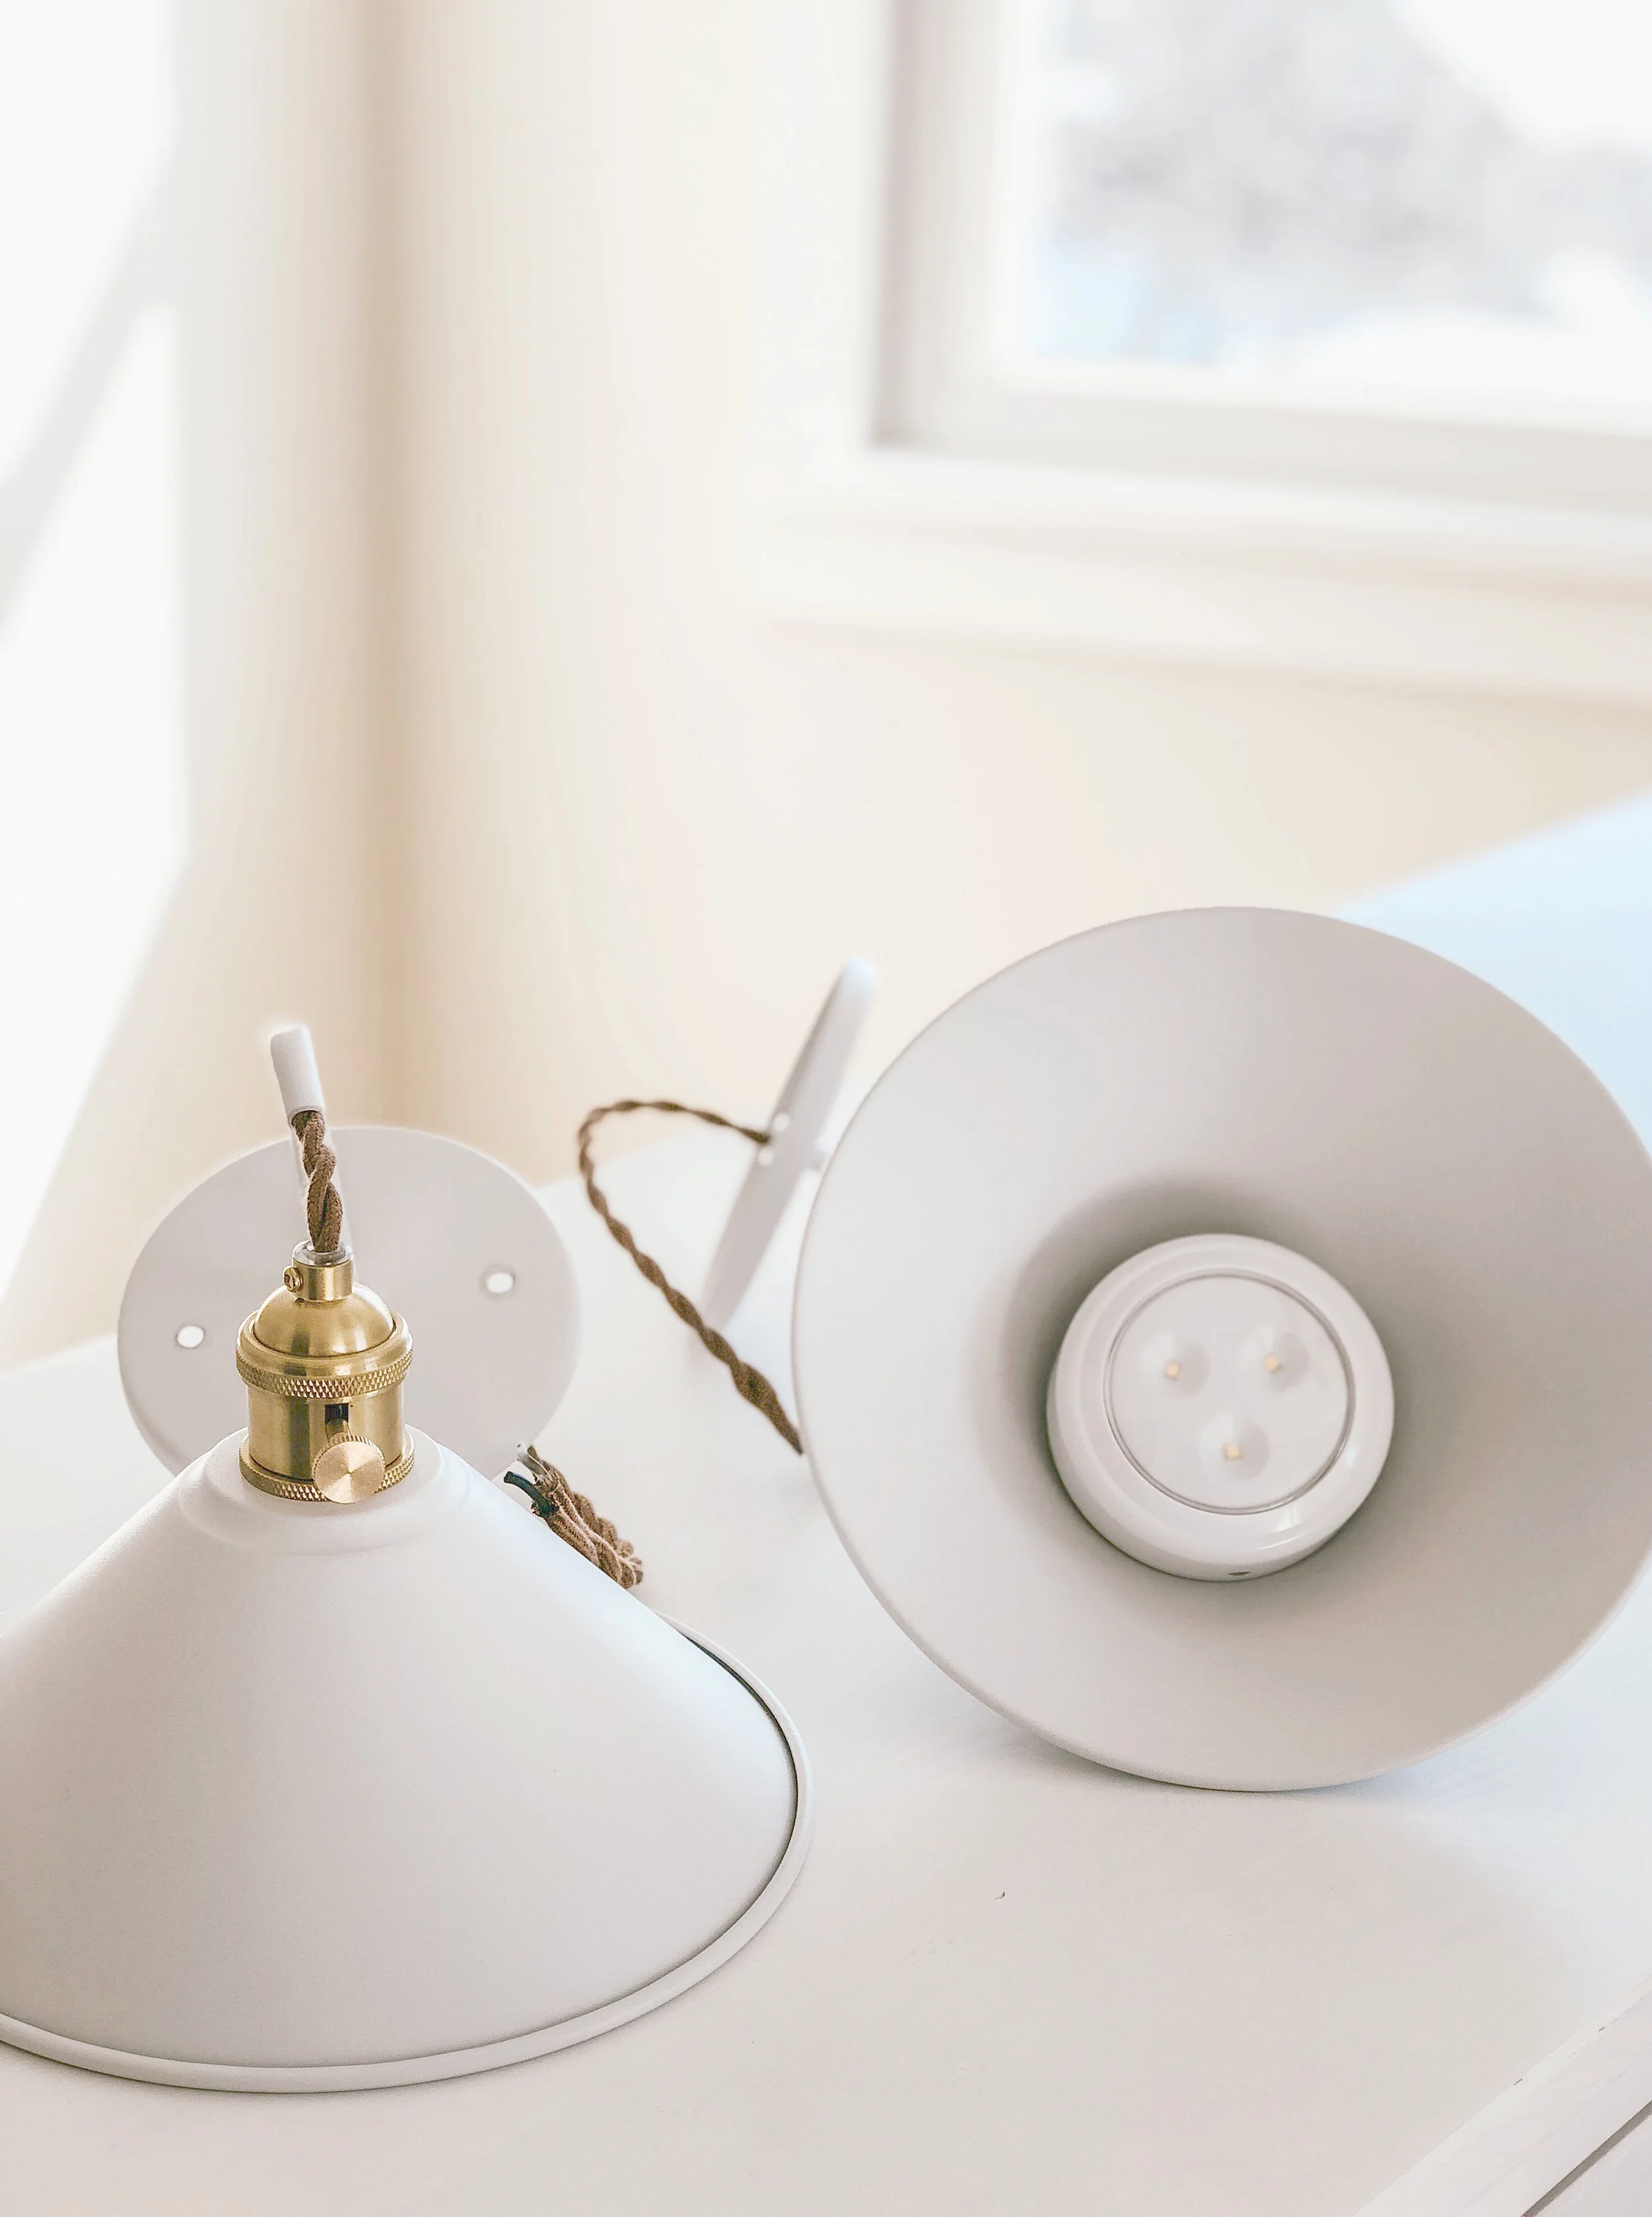
Step 3- Screw puck light on
Carefully screw on the light part of the puck being sure it is attached all the way. Repeat all steps if doing more than one sconce.
Voila!!!
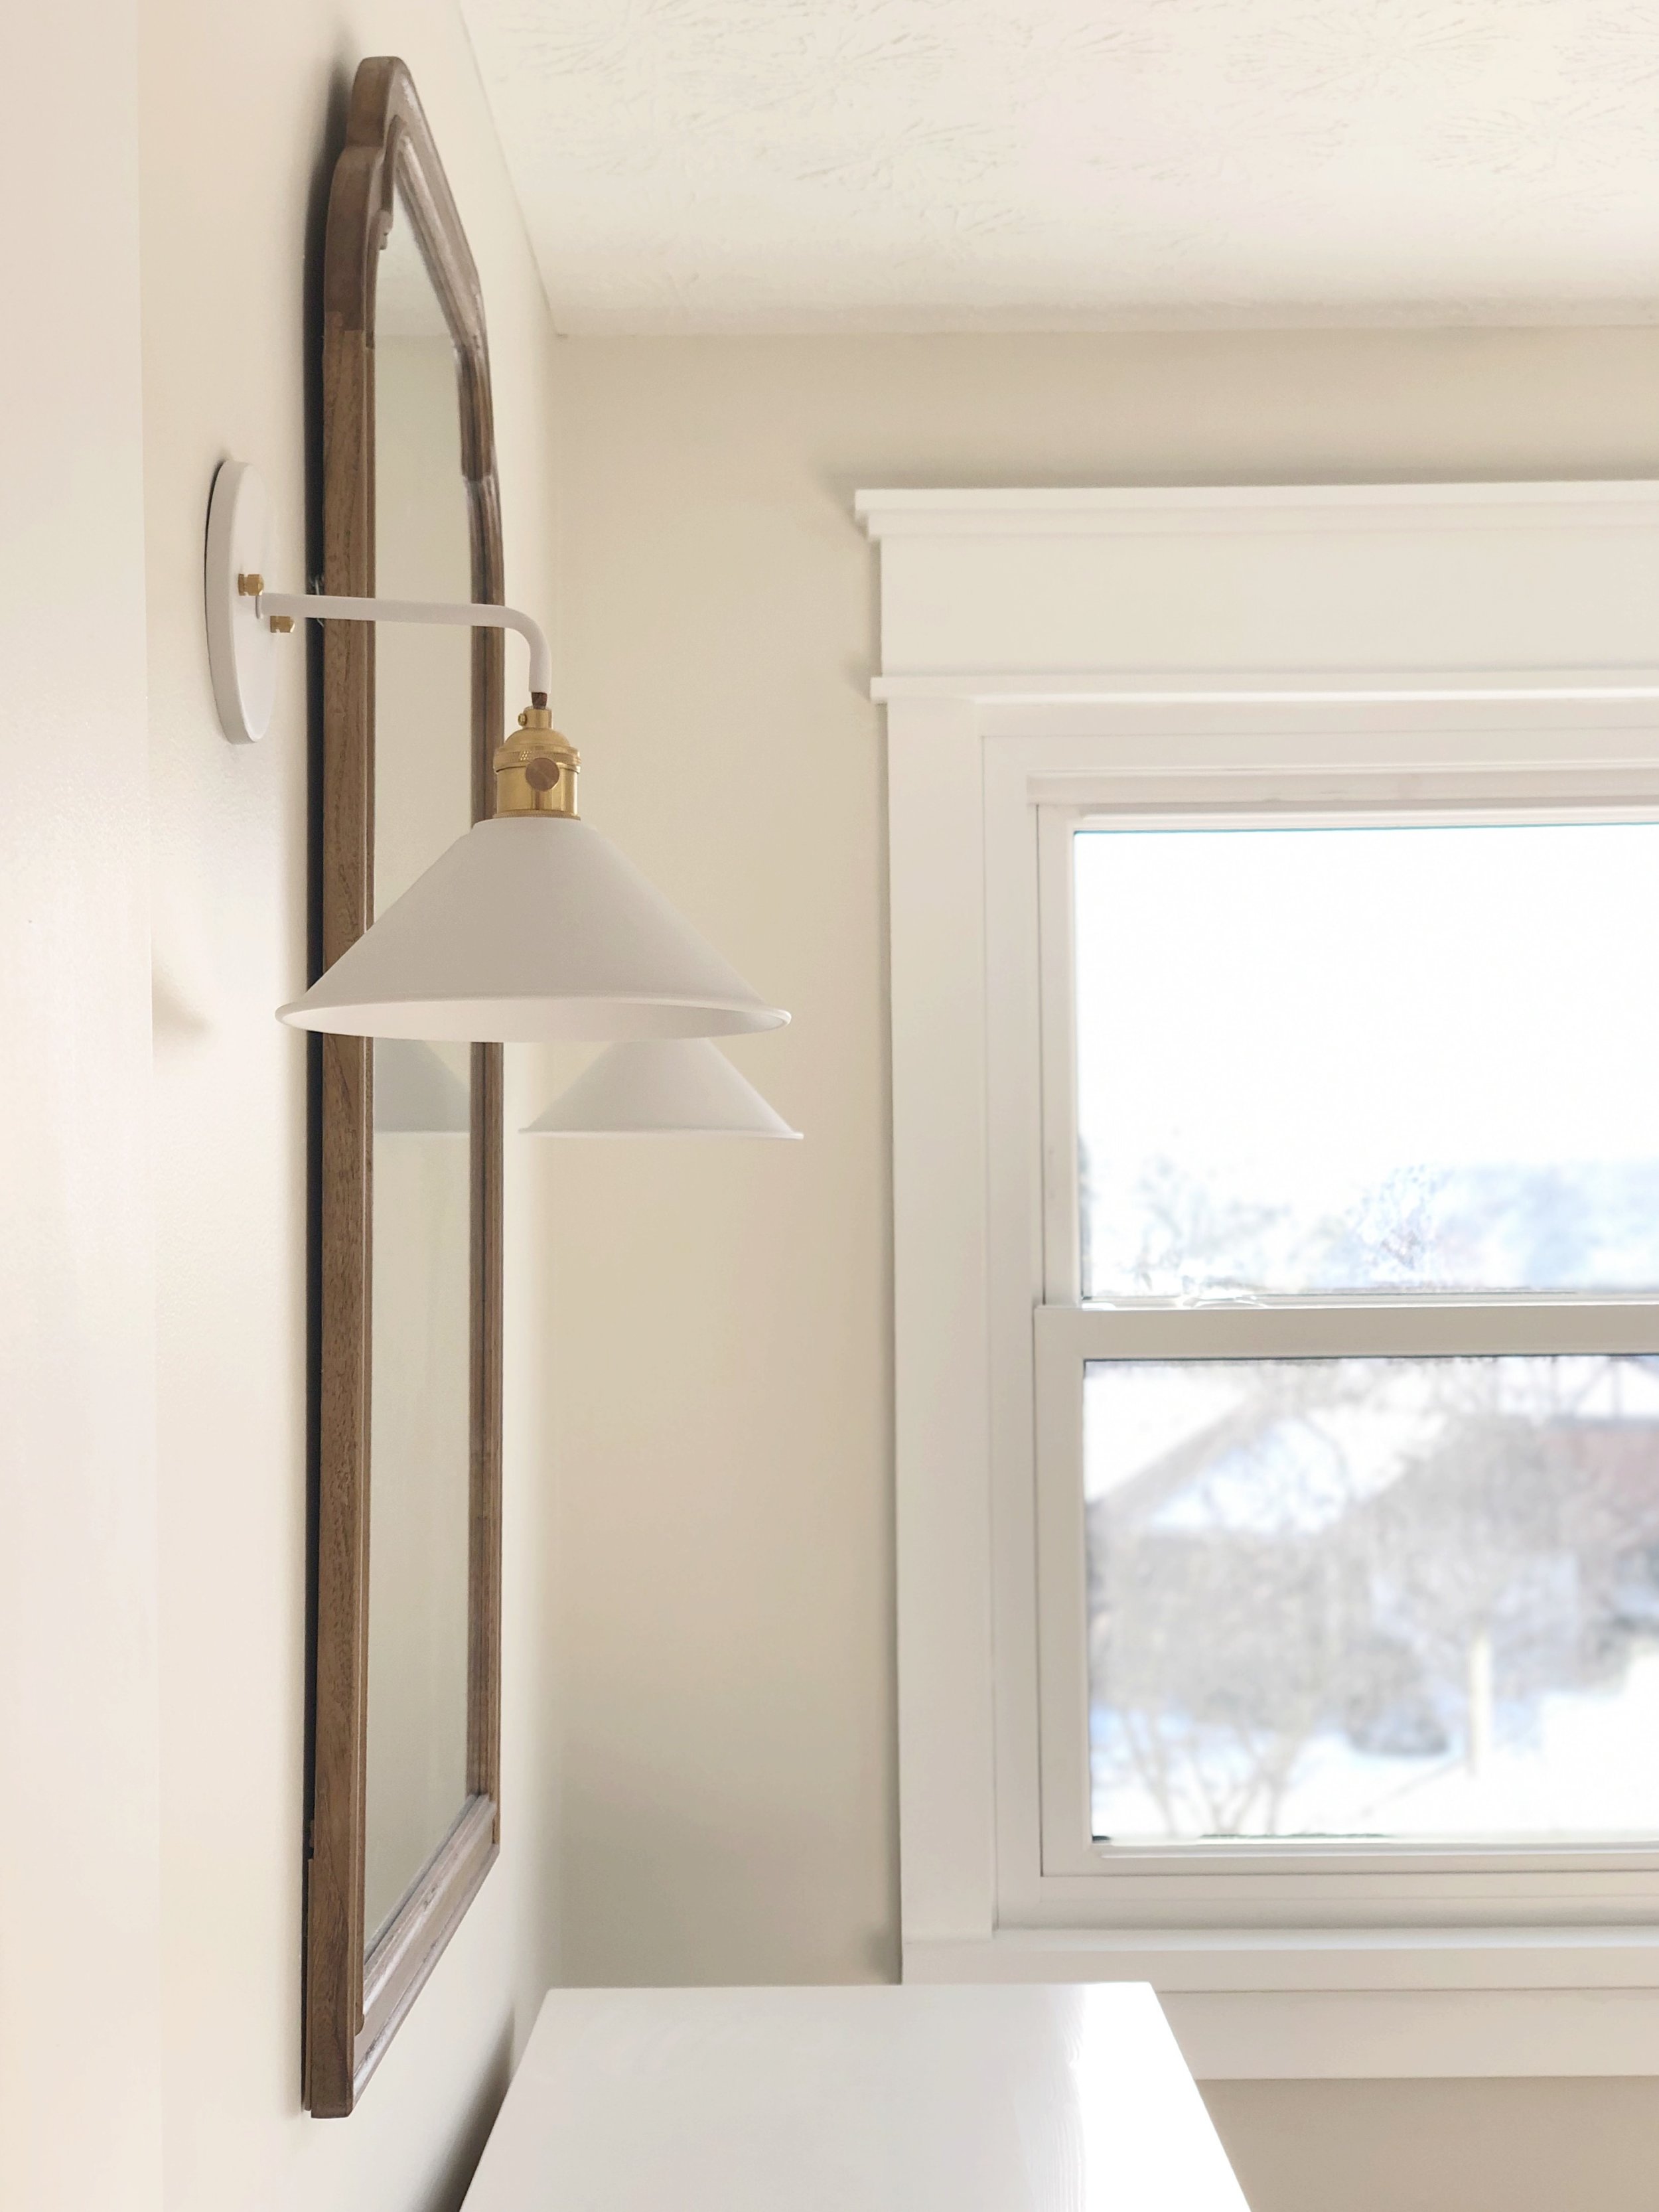
Just attach your sconce(s) to the wall and stand back in amazement as you do the mandatory remote test! This particular puck light set has multiple settings. On/off, 100% and 50% power options, as well as a dimmer so you can actually manually select the amount of light you want. I LOVE this last feature so much, and think it will be perfect for middle of the night diaper changes and feedings.
You can see below the lights off vs on. I’m thinking it would be fun to show you how they look at night as well, so keep an eye on my instastories this week if you want to see that!
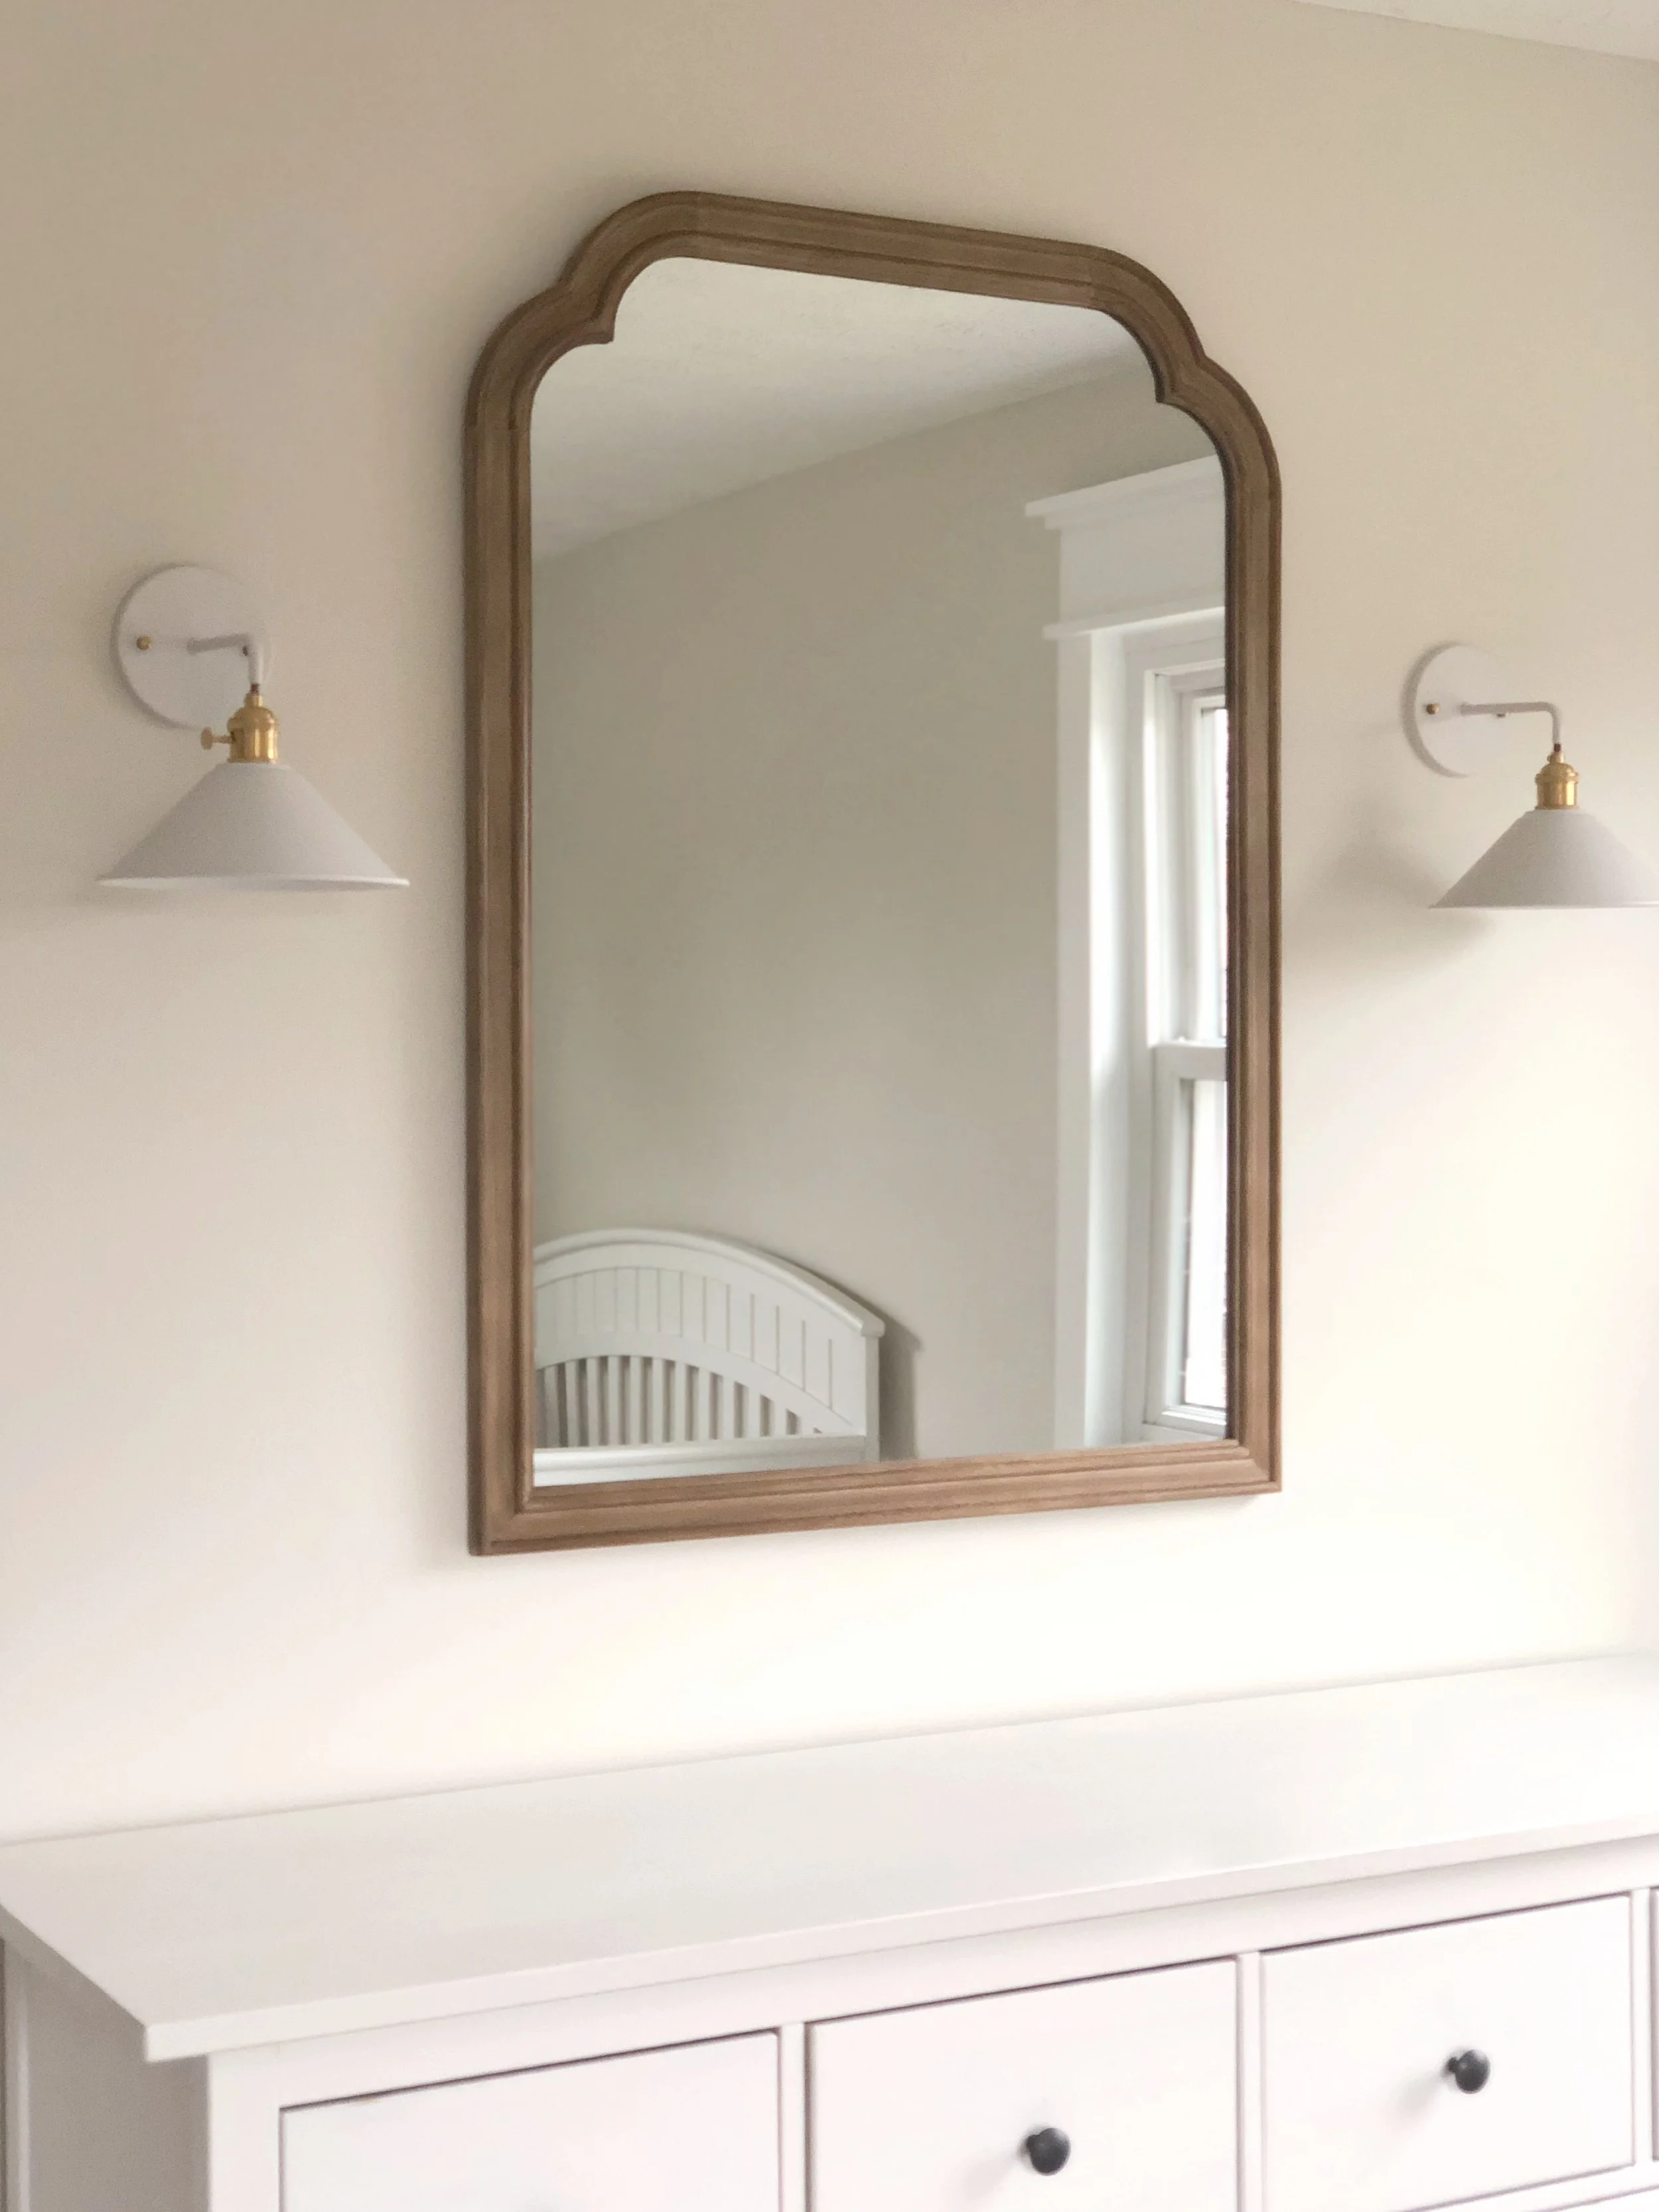
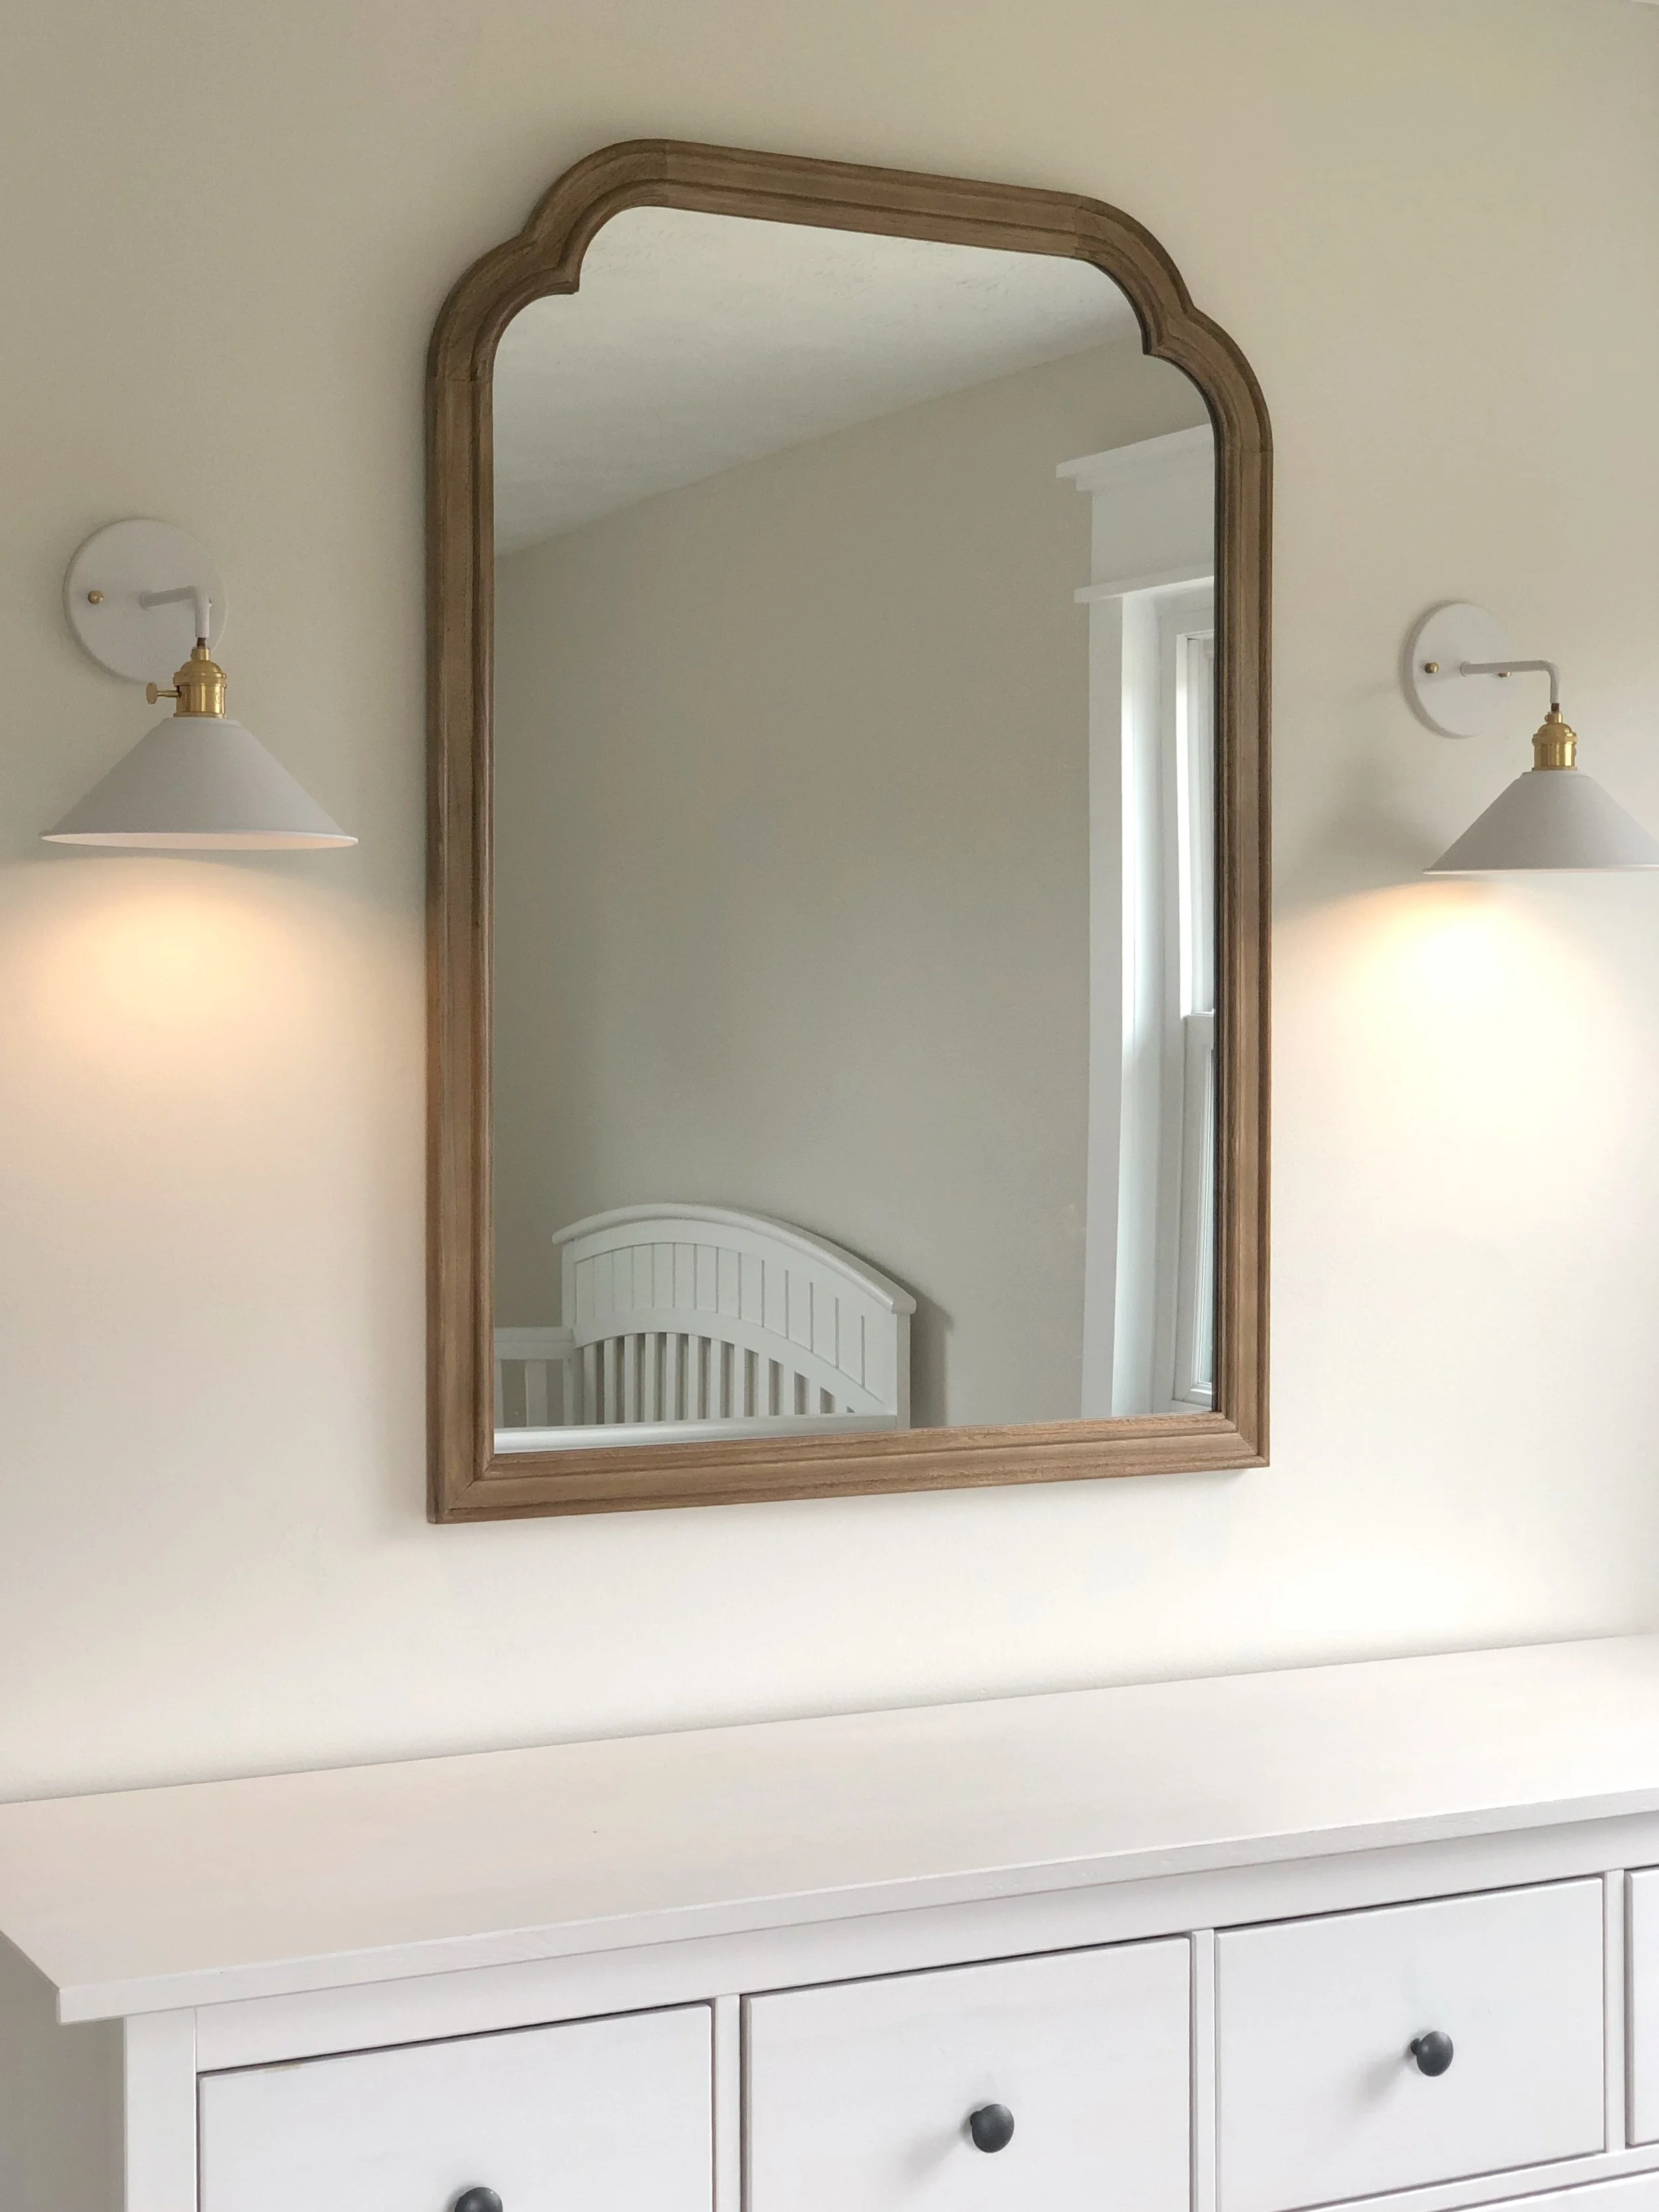
I love how much character they add to the room and think they are the perfect lighting option without taking up any valuable dresser or floor space!
It may have taken me almost a year to find a spot for Nesting with Grace’s magic light tutorial, but I have to say it was well worth the wait!!! I kept the rest of the room a secret in these photos, but trust me… the sweetest nursery reveal will be coming to the blog in just a few short months!
Be sure to tag me @theivynest and @nestingwithgrace if you add a “magic light” in your house!!